A firewall on Windows acts as a critical first line of defense, automatically monitoring and controlling both incoming and outgoing network traffic based on predetermined security rules. By blocking unauthorized access while permitting legitimate communication, it significantly reduces the risk of malware infections, data breaches, and unauthorized remote control of your device.
Most programs and games you install will connect to the internet without your permission for various reasons, such as analytics, checking for updates, and telemetry. By using a firewall program, you can control which apps are allowed to connect to the internet, which is very important, especially if you are privacy conscious.
To control which apps, games, and services on Windows get access to the internet and which ones don’t, we are going to use a third-party firewall. Sure, you can use the built-in Windows firewall, but it’s tedious, hard to use, and has a terrible user interface.
I recommend using Evorim Free Firewall, but if you aren’t happy with it for whatever reason, you can use Malwarebytes Windows Firewall Control by BiniSoft or TinyWall, but they won’t perform as well as Evorim Free Firewall.
1-Using Evorim Free Firewall:
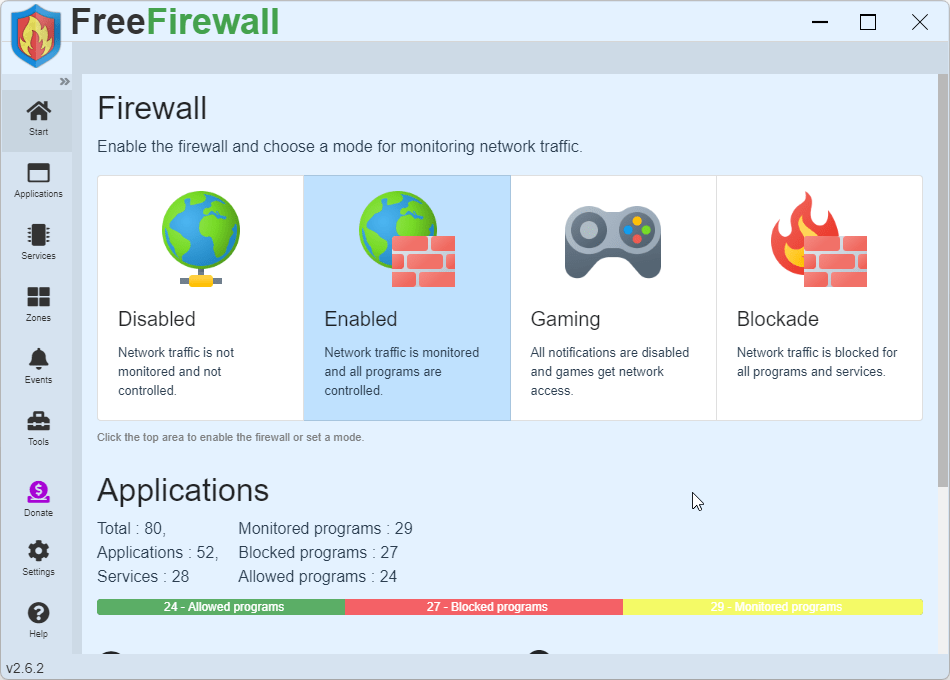
First, download the firewall from the official website by visiting this link, click on download, then install the program.
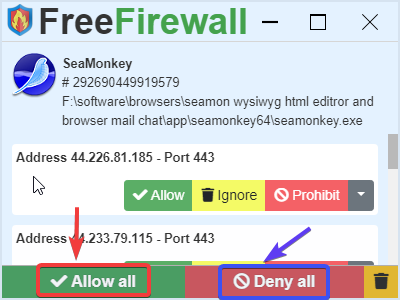
Whenever any app, game, or built-in Windows service tries to connect to the internet, Free Firewall will block that connection and prompt you to either always allow or always deny access to the internet for that program, game, or Windows service.
Click on Allow all to always allow that app to access the internet, or Deny all to always block that app from accessing the internet.
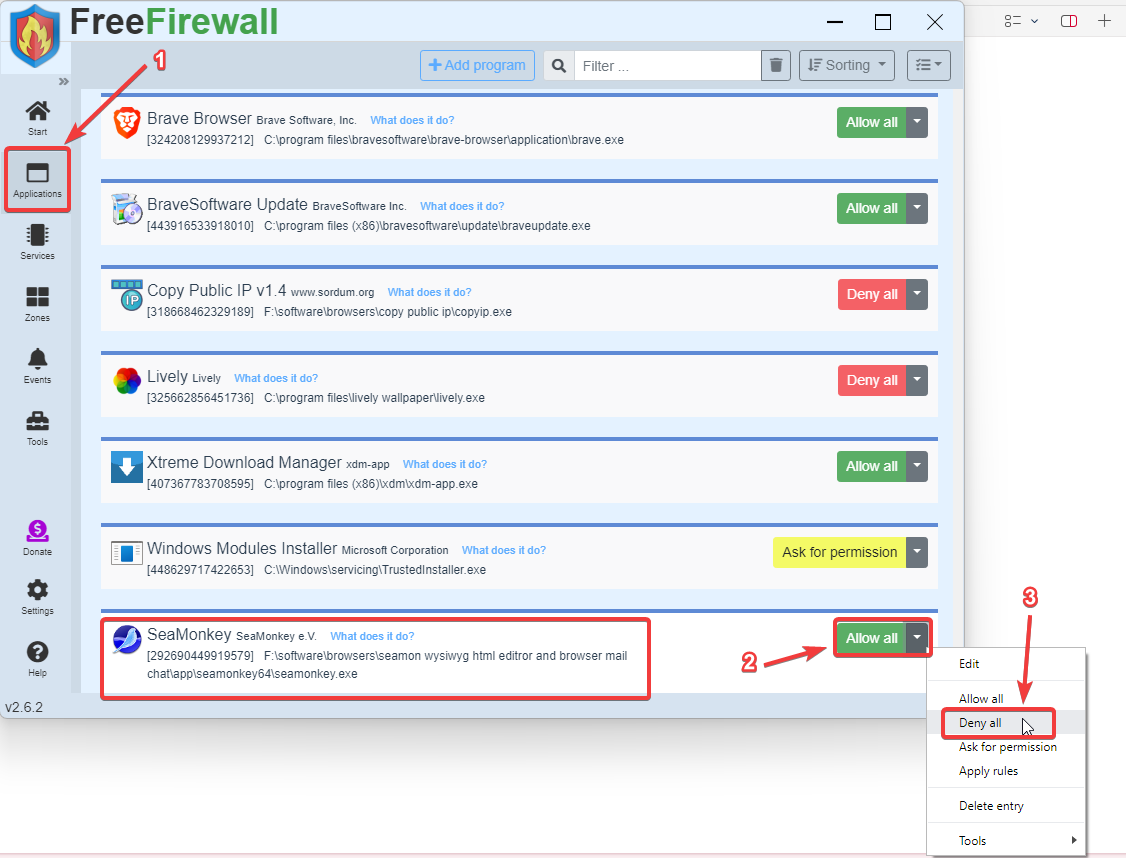
To change the rules you have already made, simply open the free firewall main window (You might find it in your taskbar’s system tray), then click on Applications, then you can scroll all the way to the bottom of the list on the right pane to find your latest rules, then click on the rule next to the program you want to change (Allow all or Deny all) and change it to Allow all to always allow that app to access the internet, Deny all to always block the app from accessing the internet, or Ask for permission to ask you to make a rule again next time that app tries to connect to the internet.
2-Using Windows Firewall Control:
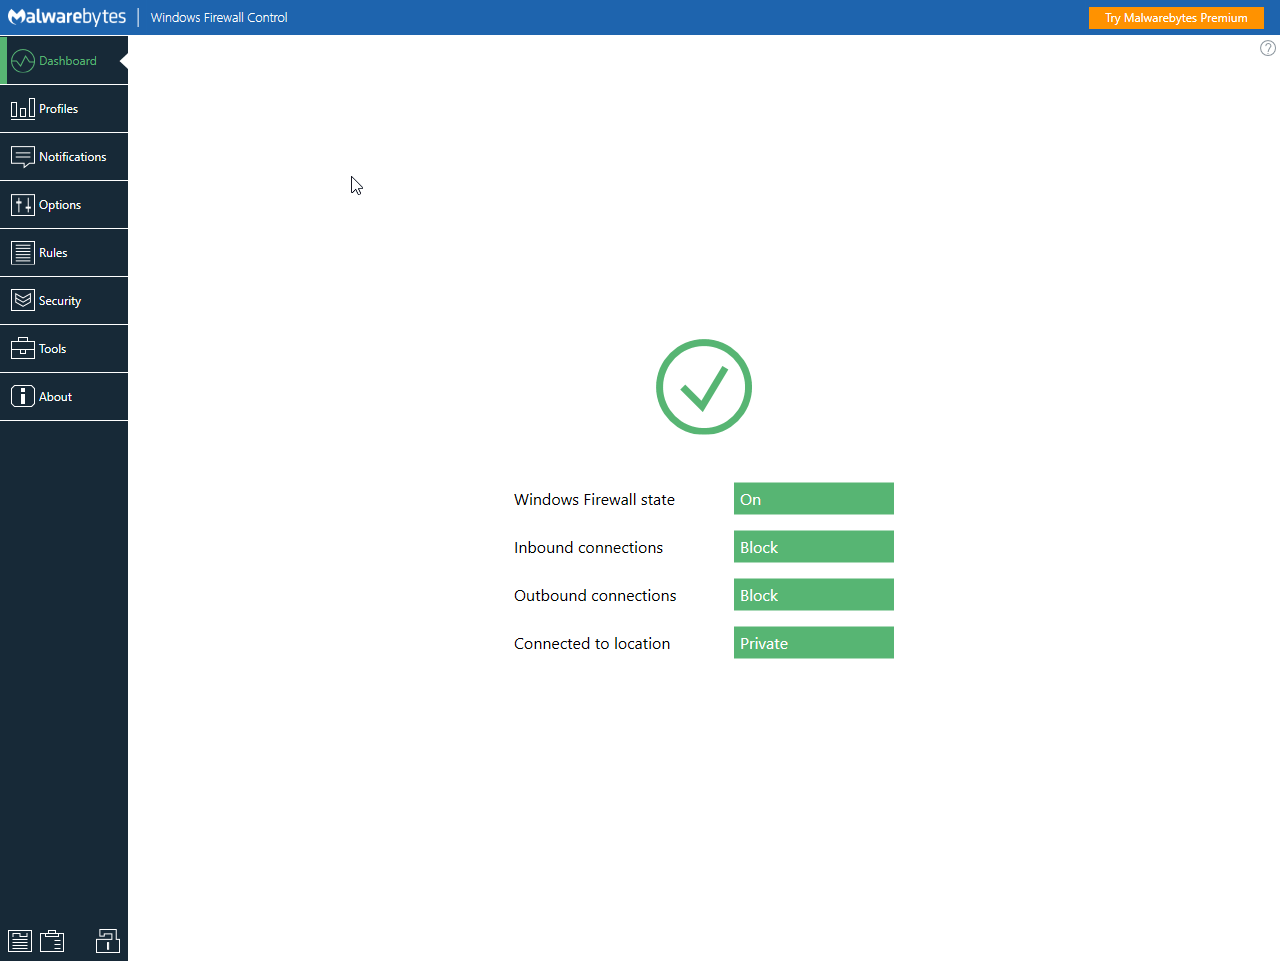
First, download the firewall from the official website by visiting this link, click on download, then install the program.
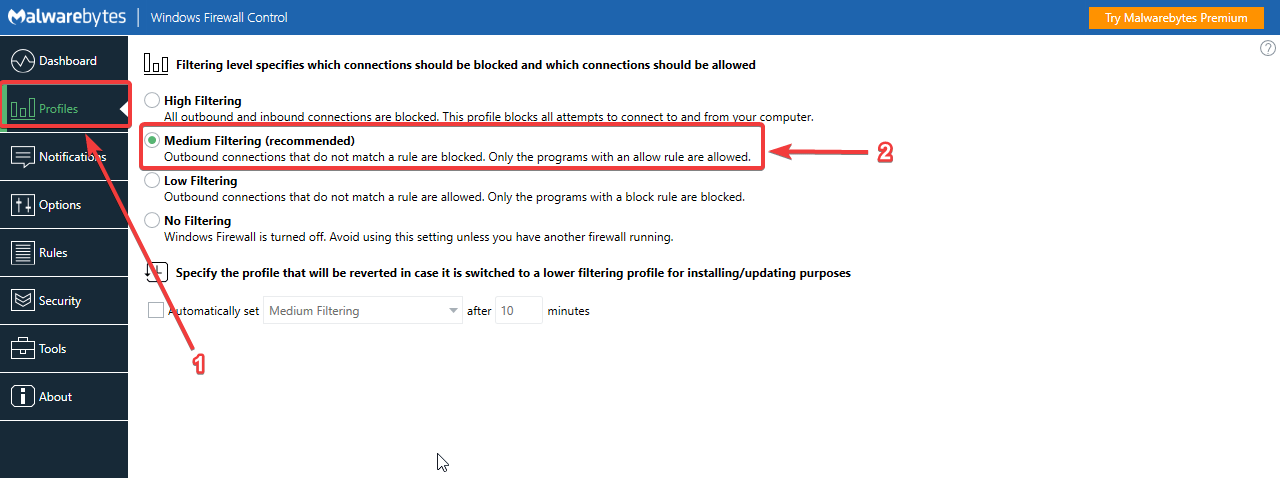
This firewall needs some configuration first, so that it can ask you for permission to allow or block programs’ access to the internet. To do so, first open the firewall main window (You can find it in the taskbar’s system tray), then click on the Profiles tab and select Medium Filtering.
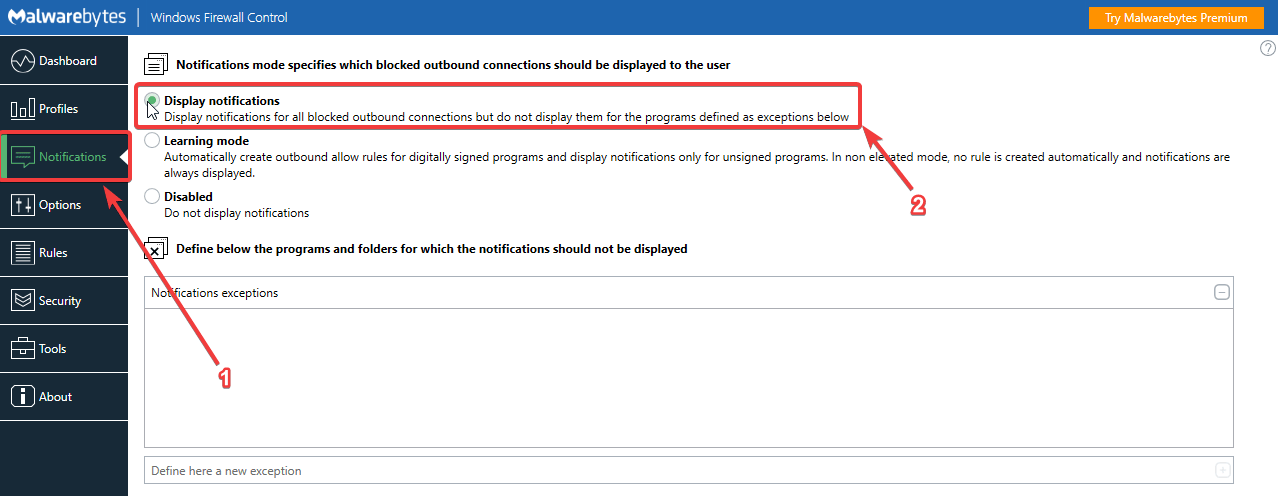
Then go to the Notifications tab and select Display notifications.
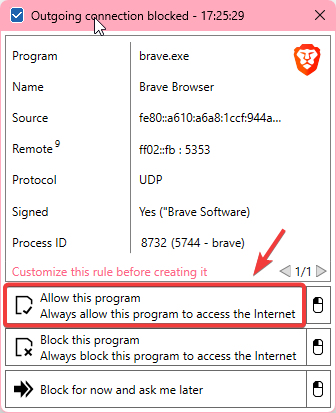
Then every time a program on your computer tries to initiate an outgoing connection to the internet, Windows Firewall Control will block that connection and ask you to either always allow it, always block that program from accessing the internet, or to block it for now and ask you later.
Note: To modify the firewall rules made with this program, you will have to use the Windows built-in firewall user interface. And even after changing the settings, some programs will get automatic access to the internet without asking you first. Which is why I don’t recommend using this firewall app, especially if privacy is your goal.
3-Using TinyWall:
First, download TinyWall from the official website by visiting this link, click on download, then install the program.
After the program installs, right-click on TinyWall in the system tray on the taskbar, hover your mouse over Change mode, then select AutoLearn.
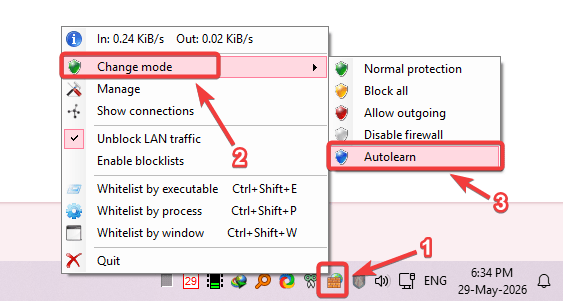
This will allow all applications on your computer to access the internet freely while that setting is active, and automatically create exception rules for them, so that after you change it to Normal protection, only these programs will be allowed access to the internet.
So while that setting is active, open the programs you want to create exceptions for, and make them connect to the internet, for example, by checking for updates from within these programs or opening a webpage in your favorite web browser.
After you are done with the programs you want to make exceptions for, right-click on TinyWall on your taskbar, then hover your mouse over Change mode, then select Normal protection.
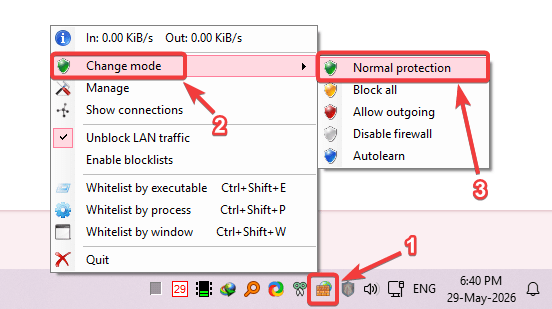
Now only the programs in your exception list will be allowed access to the internet.
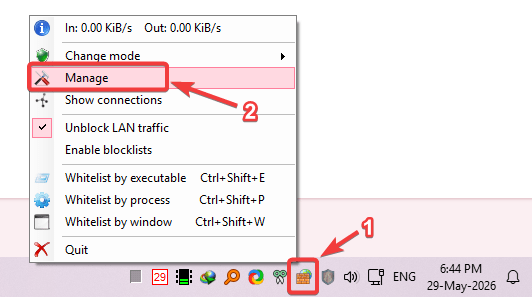
To access, modify, add, or remove applications from your exceptions list, right-click on TinyWall on your taskbar, then click on Manage.
Click on the Application exceptions tab, then select the application you want to remove from the exceptions list, then click on Remove, then click on Apply.
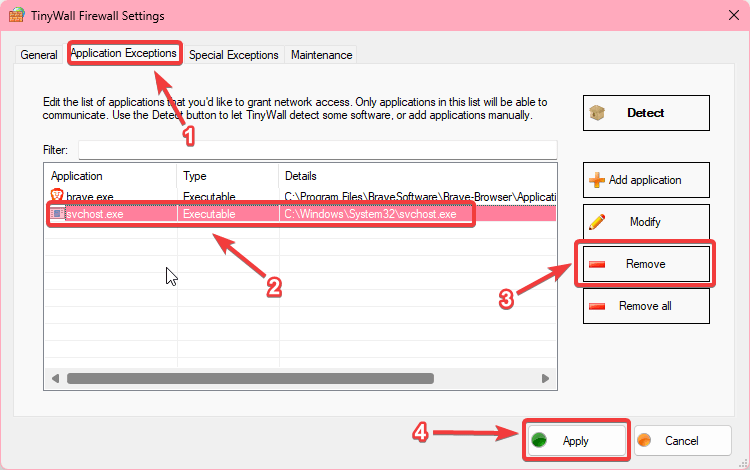
Note: I highly recommend that you allow svchost.exe to access the internet, to allow Windows updates to download, and for Windows to work the way it should.
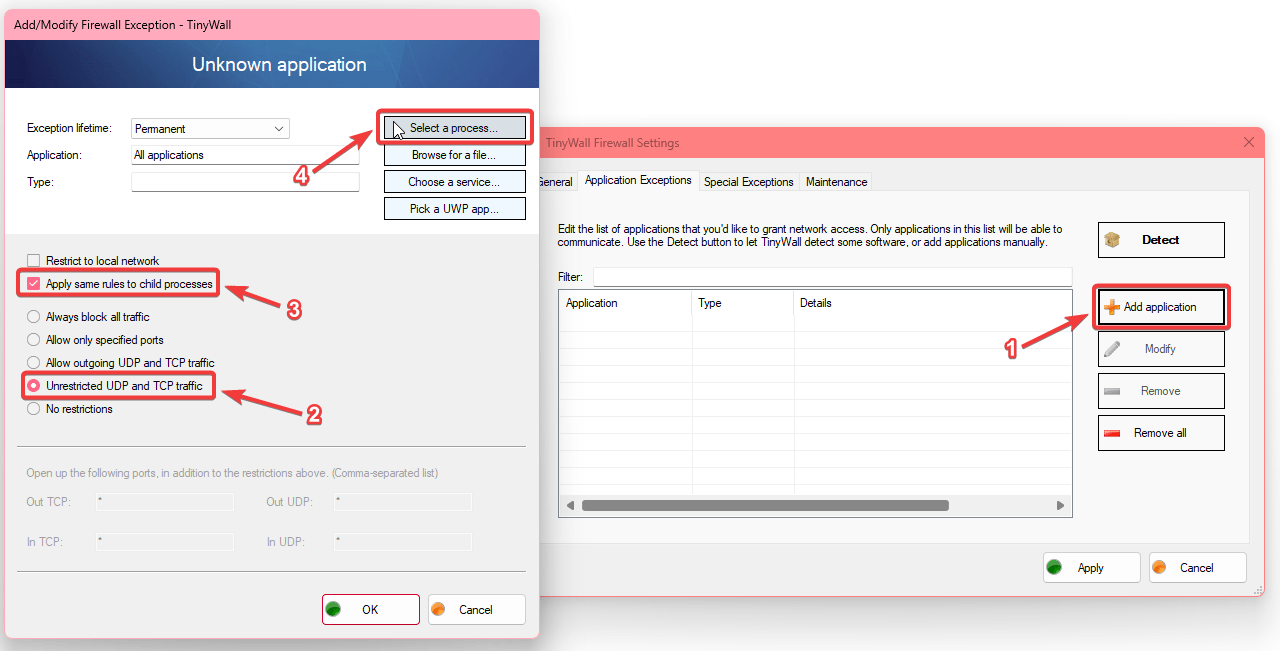
To add an application to the exceptions list, you can follow the instructions above, or you can start the program you want to make an exception for, then click on Add application, then select Apply same rules to child processes and Unrestricted UDP and TCP traffic, then click on Select a process.
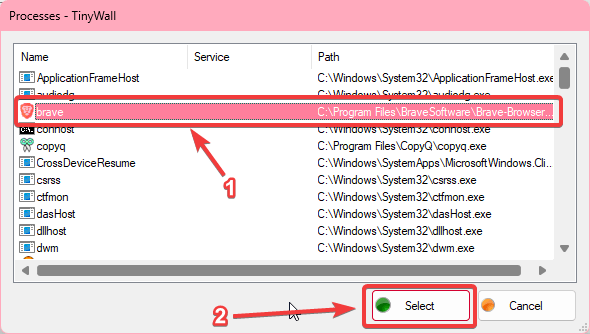
Select the program you want to allow access to the internet, then click on Select.
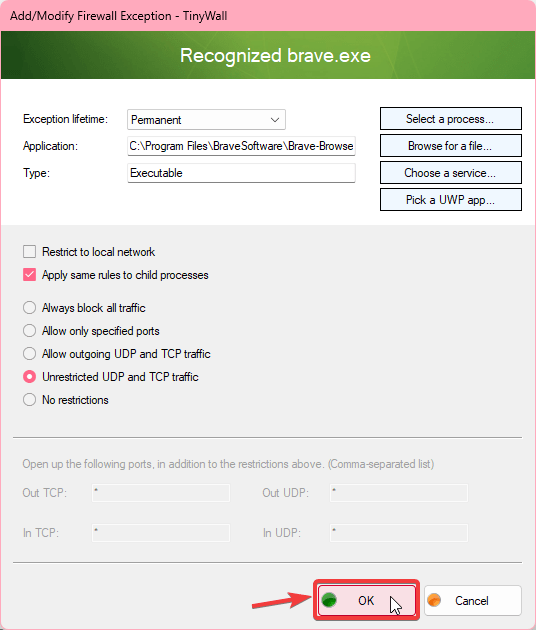
Then click on OK.
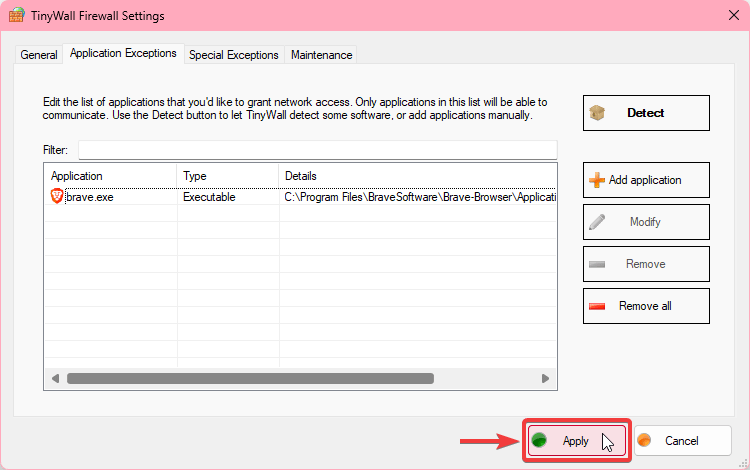
Then click on Apply.
And that’s it.