There are a few ways to hide or protect your files in Windows, but if someone knows where to look they might be able to access your files.
In this tutorial you will learn how to hide a file or files inside another inconspicuous file such as an image ,video, or a pdf file. the inconspicuous file will function as normal but you can still access your hidden file or files inside of it by a few simple steps.
Before we begin you need to enable always show file extensions in Windows, you can do so by following the tutorial at this link.
First you need to put the file or files you want to hide from other people inside a zip archive, because the process of merging or hiding a file inside another file will damage your files and make them unreadable otherwise, for that you are going to have to use a Windows program called WinRar.
To download WinRAR first visit its official website by clicking here, then click on WinRAR x64 (64 bit) to download the latest version available for Windows.
Then double click on the file you have just downloaded to start the installation.
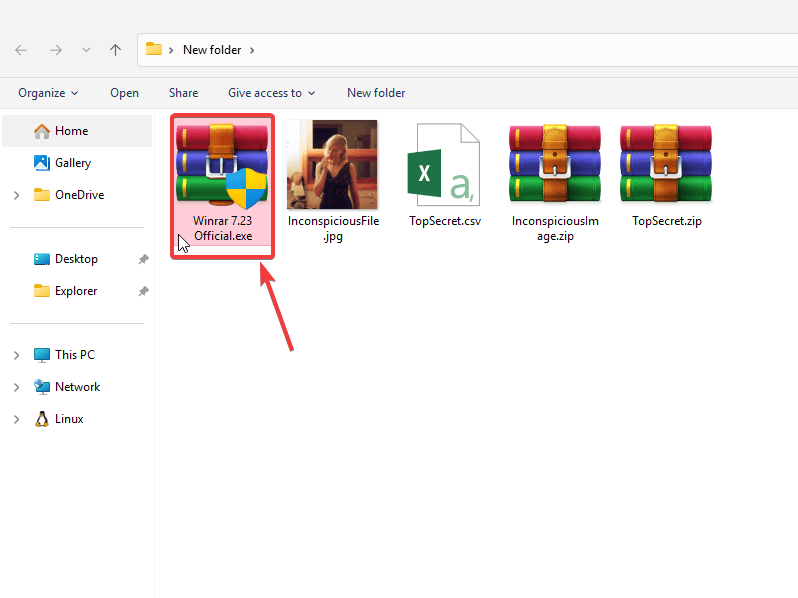
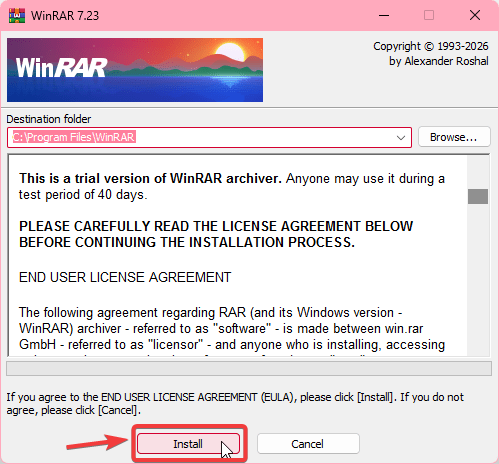
Then click on Install.
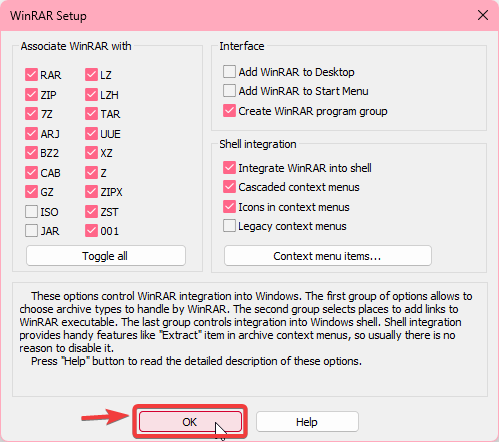
When it’s done, make sure the options Integrate WinRar into shell and Icons in context menus under Shell integration are checked, then click Ok.
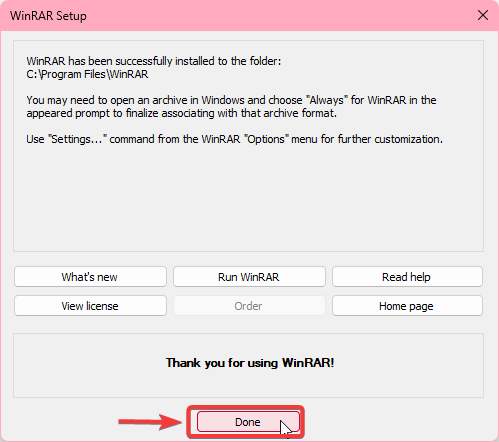
Then click Done.
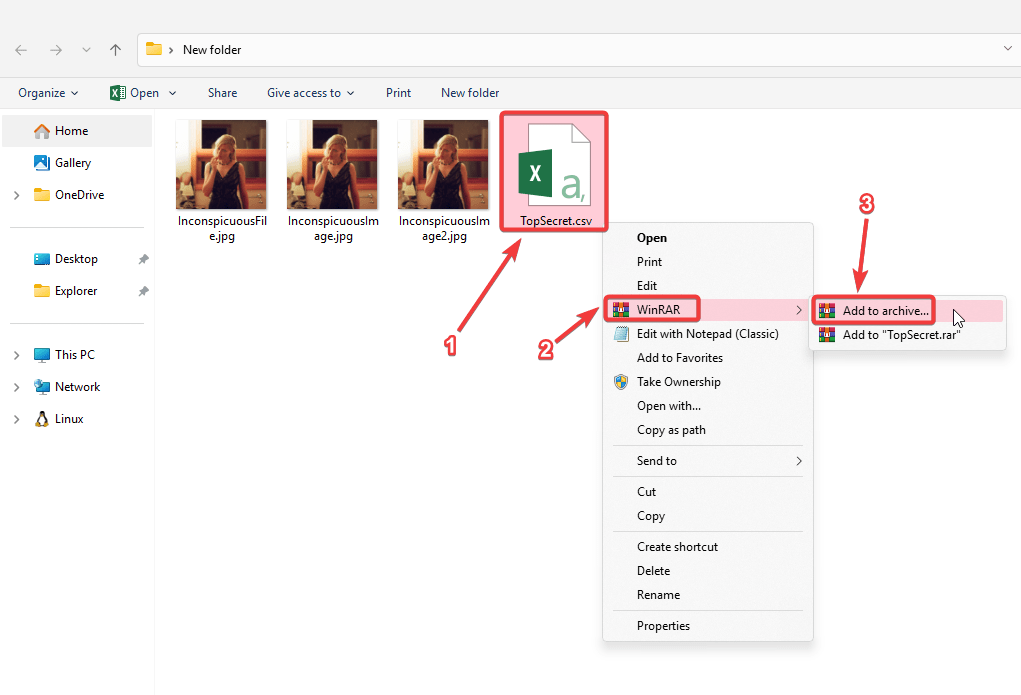
Then select the file or files you want to hide and right-click on one of them, hover over WinRar, then click on Add to archive.
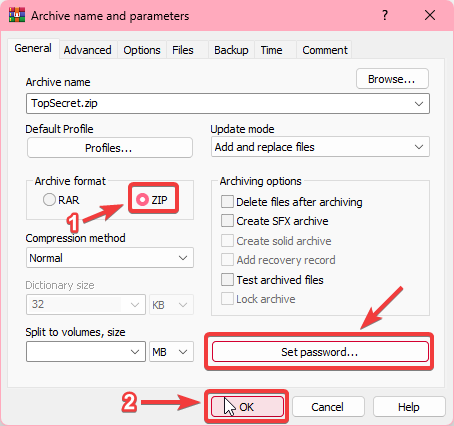
Then select ZIP and click Ok (you can also click on Set password… to lock your archive with a password for added security)
Then prepare the file you want to hide that zip archive inside, it could be an image, video, pdf file or something else, however it shouldn’t be a text file, Microsoft word file, or anything similar to text, because when opening those files after hiding your files inside them you can easily tell something is wrong.
Then rename the file you want to hide that zip archive inside to anything that doesn’t contain spaces such as InconspicuousFile.jpg, if you are using an image with .jpg file extension.
Then put that file on your Windows desktop, and put the archive that contains your secret files on your Windows desktop as well, and rename that archive to anything that doesn’t contain spaces such as TopSecret.zip.
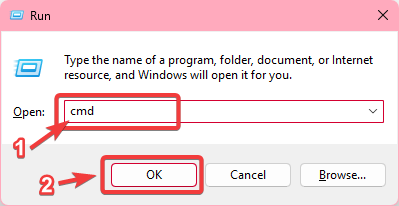
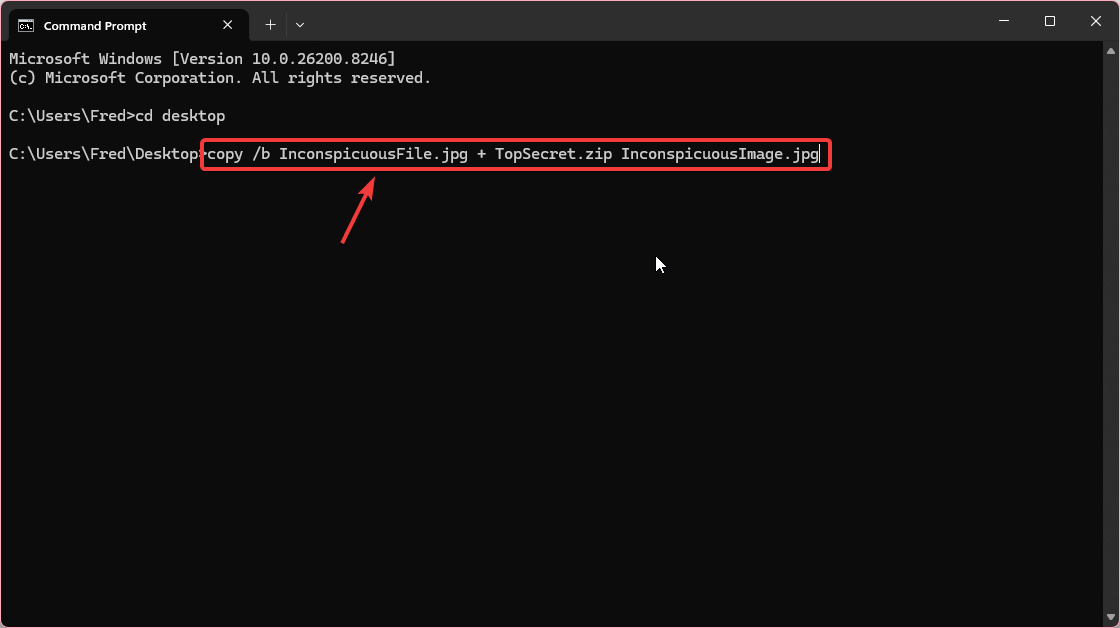
Now open command prompt by pressing Windows key + R on your keyboard and type cmd then press enter or hit ok.
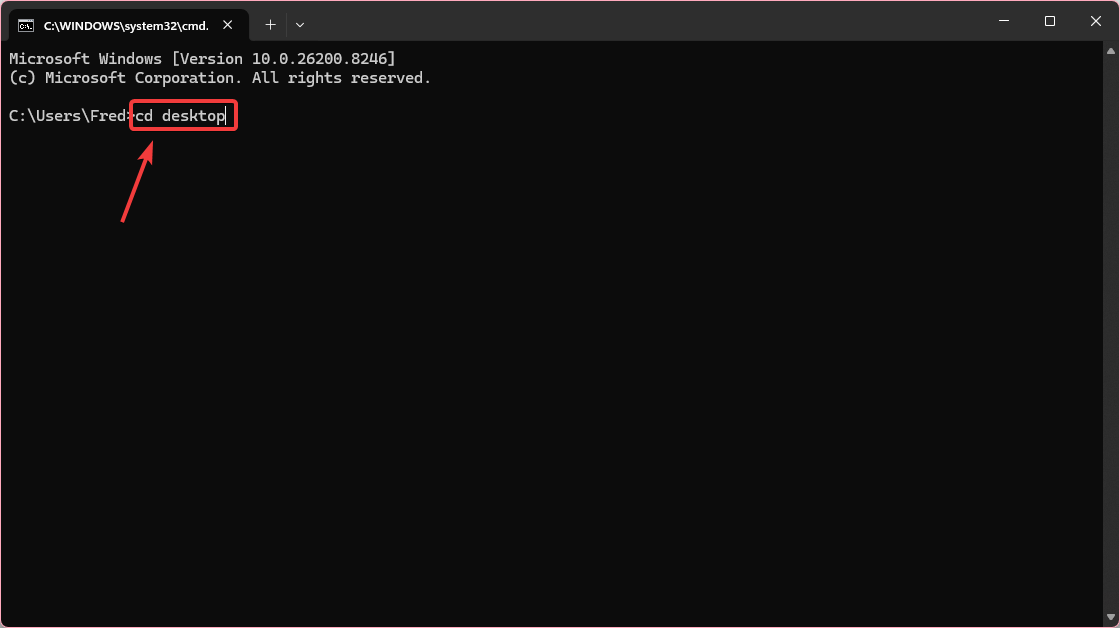
Type cd desktop then press enter on your keyboard.
Then type copy /b InconspicuousFile.jpg + TopSecret.zip InconspicuousImage.jpg then press enter on your keyboard (Change InconspicuousFile.jpg to the name of the file you will hide your zip archive inside, TopSecret.zip to the name of the zip archive you will hide, and change InconspicuousImage.jpg to the name of the file that will be created by this merging process which must have the same file extension as the file you will hide your zip archive inside)
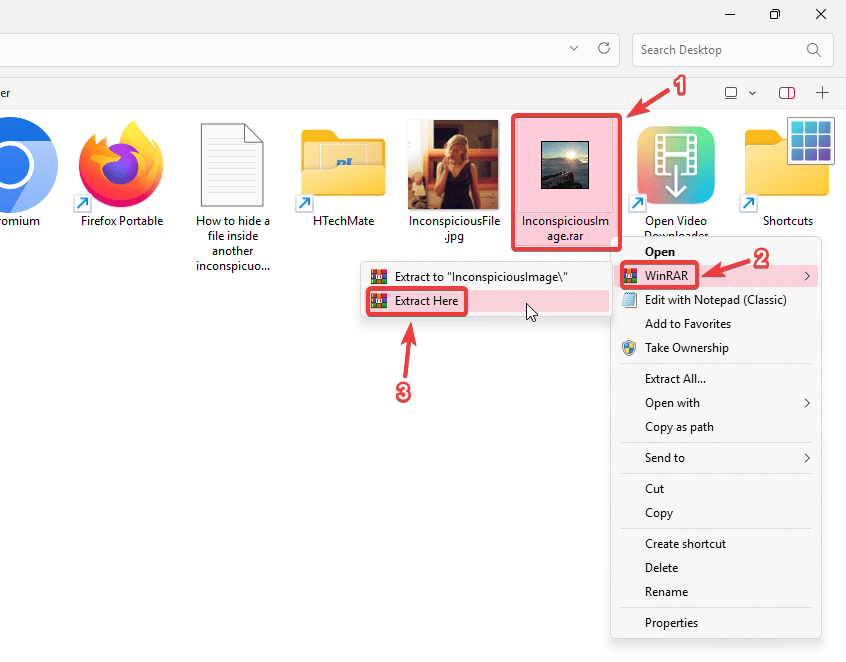
Congratulations, you have now created a normal looking image that contains your secret files inside, to access these secret files, all you have to do is rename the image you created InconspicuousImage.jpg to InconspicuousImage.zip, then right-click on it, hover over WinRar, then click on Extract here.
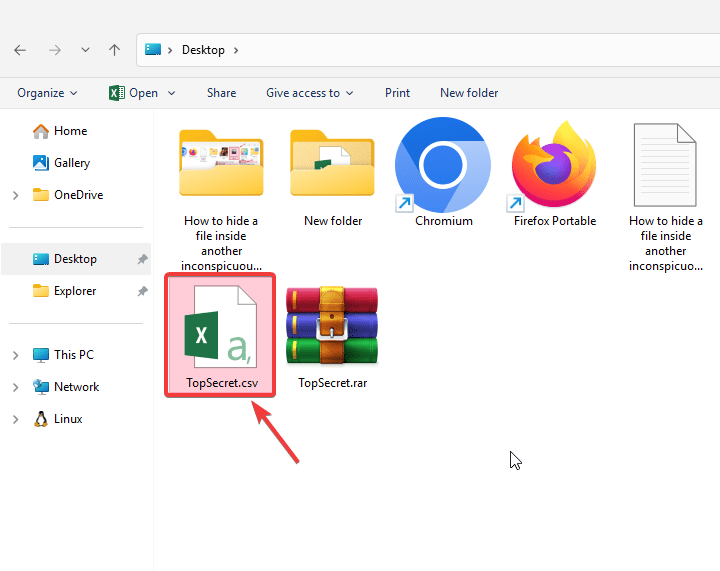
Then you can access your secret file or files and confirm they work as intended.
Done.
Note: You can use another program such as 7-zip or PeaZip instead of WinRar for the creation of the archive you will hide your secret files inside, however, you must use WinRar when extracting that archive after you have hidden it inside another file, because 7-zip and PeaZip will claim the archive is damaged and will not be able to extract your files from it.