Windows updates are designed to keep your computer secure and up to date by providing essential security fixes, software enhancements, and new features. They help protect against vulnerabilities and improve the overall performance of the operating system.
So it’s recommended to update Windows regularly.
Turning off Windows automatic updates can prevent unexpected disruptions during your work, such as forced restarts or updates that occur while you’re using your computer. Additionally, it allows you to control when and how updates are applied, which can be important for maintaining system stability and performance.
1-Windows 11 Pro , Education, and Enterprise:
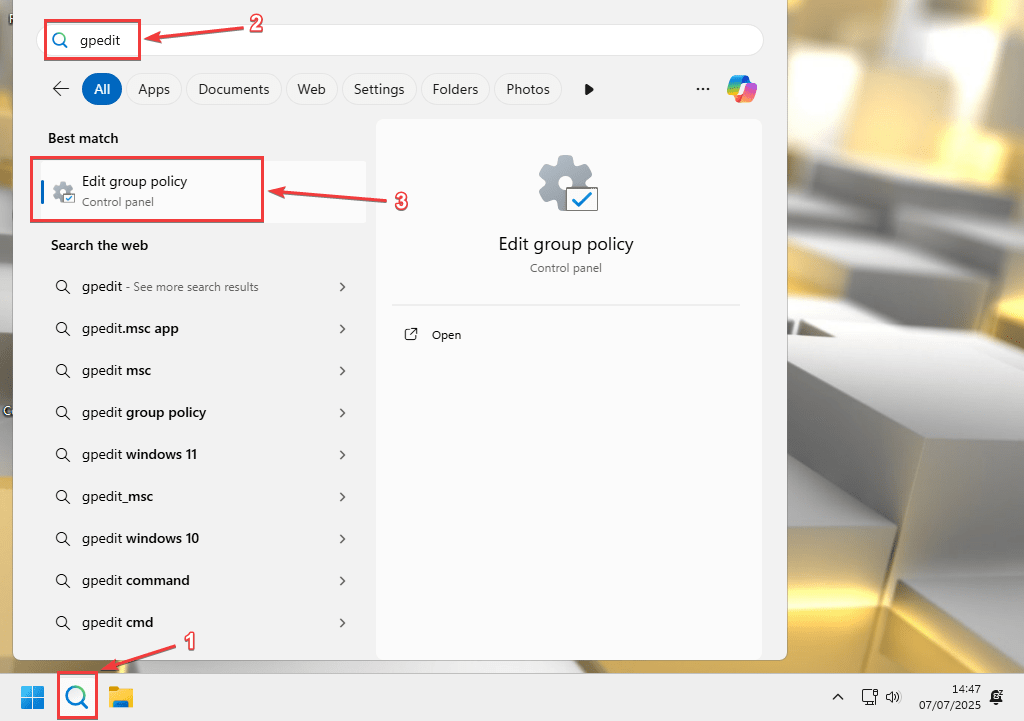
To turn off Windows 11 automatic updates, open “Local group policy editor” by searching for it, click on the search icon on your taskbar, or press on “Windows key + S” on your keyboard simultaneously to open the search.
Then type “Group” or “gpedit” then click on “Edit group policy”.
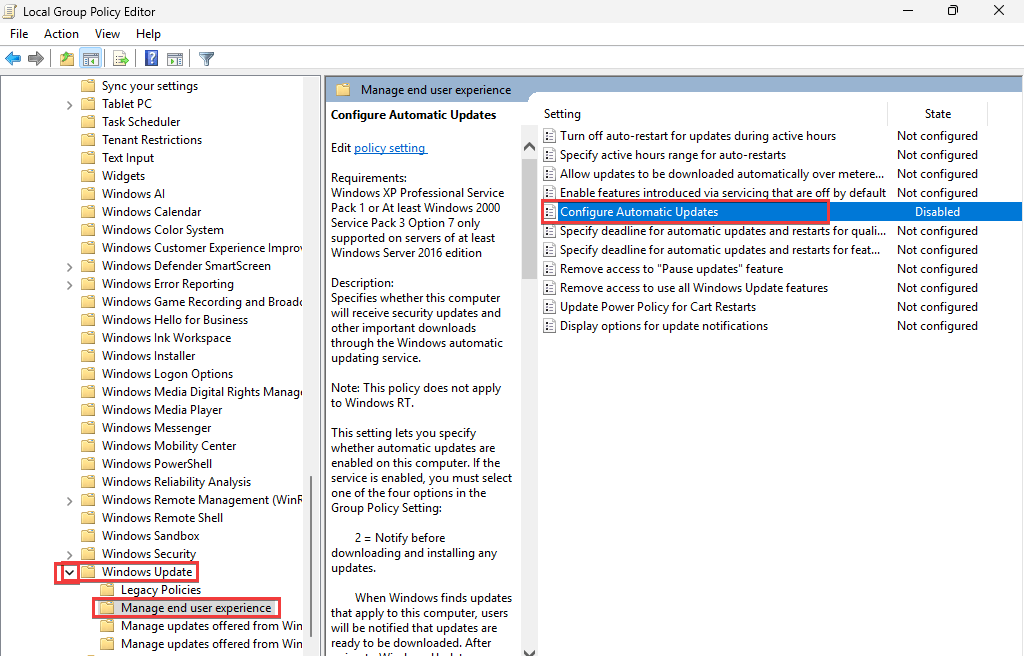
In the left pane, under “Local Computer Policy”, click on “Computer Configuration”, then double-click “Administrative Templates”, then double click “Windows Components”, then double click “Windows Update”, then choose “Manage end user experience”, then on the right pane double click “Configure Automatic Updates”.
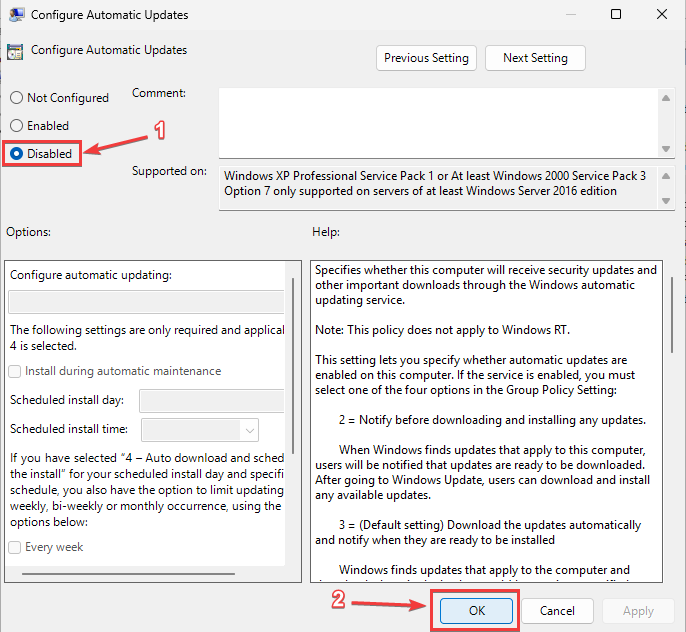
Select “Disabled” then click “Ok”
Note: the above method is the most reliable for disabling Windows 11 automatic updates, but it does require Windows 11 Pro, Enterprise, or Education editions.
2-Windows 11 Home:
To permanently stop Windows 11 Home updates, download the registry file from this link:
https://drive.google.com/file/d/1QwijrZomqwjoC4v448O2DybfgtWA6VcZ/view?usp=sharing
Confirm to download the file anyway after Google drive warns you.
Then run the downloaded file, then click on Yes, then click on Ok. Then Windows 11 updates will pause until year 3000, long enough for you and your great great great great grandkids, assuming your computer could even continue to work for that long.
If you are worried about the file being malware, then copy and paste the following in your favorite notepad app.
Windows Registry Editor Version 5.00

[HKEY_LOCAL_MACHINE\SOFTWARE\Microsoft\WindowsUpdate\UX\Settings]
"AllowMUUpdateService"=dword:00000000
"ActiveHoursStart"=dword:00000008
"ActiveHoursEnd"=dword:00000000
"PauseFeatureUpdatesStartTime"="2026-05-07T12:19:47Z"
"PauseFeatureUpdatesEndTime"="3000-02-19T12:19:47Z"
"PauseQualityUpdatesStartTime"="2026-05-07T12:19:47Z"
"PauseQualityUpdatesEndTime"="3000-02-19T12:19:47Z"
"PauseUpdatesStartTime"="2026-05-07T12:19:47Z"
"PauseUpdatesExpiryTime"="3000-02-19T12:19:47Z"
"FlightSettingsMaxPauseDays"=dword:0001869f
Then save it as Pause Windows 11 Updates Till Year 3000.reg, or any other name of your choice as long as it has the .reg file extension at the end of it.
Then run the file you have just created, then click on Yes, then click on Ok.
Note: This method works on all Windows Editions and versions, including Windows 11 Home, Pro, and Enterprise.